Slice and Dice Like a Pro: How to Sharpen a Bread Knife with a Whetstone
Table of Contents
ToggleIntroduction:
In the bustling realm of culinary craftsmanship, a sharp and reliable bread knife is an indispensable ally, essential for effortlessly slicing through the crustiest baguettes or softest loaves. However, even the finest blades lose their edge over time, leading to frustratingly jagged cuts and diminished performance.
By providing a step-by-step description of how to sharpen a bread knife with a whetstone, this leader searches to explain the course. Let’s explore the sharpening procedure and discover the keys to a flawlessly polished bread knife.
What are the benefits of sharpening a bread knife with a whetstone?
Sharpening a bread knife with a whetstone offers several notable benefits, contributing to both the performance of the knife and the overall culinary experience. Here are some key advantages:
Enhanced Cutting Performance:
Sharpening a bread knife with a whetstone ensures a consistently sharp edge. This razor-sharp edge allows the knife to effortlessly glide through bread, achieving clean and precise cuts. The improved cutting performance minimizes the need for excessive force, reducing the risk of squashing or compressing delicate loaves.
Extended Lifespan of the Knife:
Regularly sharpening a bread knife with a whetstone helps preserve its longevity. Dull knives tend to experience more wear and tear, leading to the need for more frequent replacements. By maintaining a sharp edge, you not only save on the cost of buying new knives but also contribute to the sustainability of your kitchen tools.
Versatility in the Kitchen:
A well-sharpened bread knife becomes a versatile tool that can handle more than just slicing bread. It can excel at cutting through a variety of foods, such as cakes, tomatoes, and fruits, expanding its utility in the kitchen. This versatility makes the sharpened bread knife a go-to option for different culinary tasks.
Cost-Effective Solution:
Investing in a quality whetstone is a cost-effective solution compared to purchasing new knives or using professional sharpening services.
Culinary Satisfaction:
A certain satisfaction comes from using a well-sharpening bread knife. The joy of effortlessly slicing through a fresh loaf or creating precise cuts adds to the overall culinary experience, making preparing meals more enjoyable and rewarding.
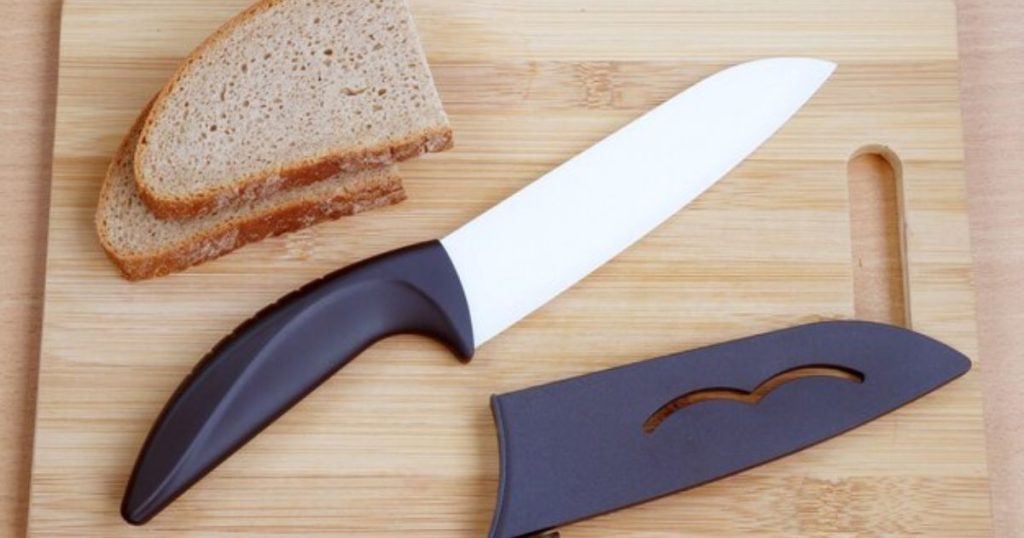
What are the characteristics of Different types of bread knife?
Serrated Bread Knife:
- Characteristics: This is the most traditional and widely used bread knife. It features a serrated edge with teeth that grip and cut through crusty bread without squashing it.
- Best For: Ideal for crusty bread and artisanal loaves with a tough exterior.
Offset Bread Knife:
- Characteristics: The blade of an offset bread knife is set at an angle to the handle, allowing for a more comfortable and ergonomic grip. This design enables the user to maintain better knuckle clearance while slicing.
- Best For: Suited for slicing through large loaves without the knuckles interfering with the cutting surface.
Scalloped-Edge Bread Knife:
- Characteristics: Instead of traditional serrations, scalloped-edge knives have rounded, smooth indentations along the blade. This design is gentler on soft bread and reduces tearing.
- Best For: Great for softer bread, cakes, and delicate pastries.
Double-Serrated Bread Knife:
- Characteristics: These knives have serrations on both sides of the blade, providing a more aggressive cutting action. The dual serrations are effective for tackling various types of bread.
- Best For: Versatile enough to handle both soft and crusty bread with precision.
Japanese-Style Bread Knife:
- Characteristics: Inspired by Japanese knife design, these knives often have a thinner and sharper blade. They may feature fewer serrations or even a plain edge, allowing for cleaner cuts.
- Best For: Suitable for precision slicing and thinner cuts on various types of bread.
Electric Bread Knife:
- Characteristics: Electric bread knives feature a motorized blade that oscillates rapidly, making slicing effortless. They are convenient for individuals who may struggle with manual cutting.
- Best For: Ideal for individuals with limited hand strength or those who frequently slice large quantities of bread.
Bread and Bagel Knife Combo:
- Characteristics: Some knives feature a dual-purpose blade with one side serrated for bread and the other side with a plain edge for bagels or other tasks.
- Best For: Versatile use in the kitchen for slicing both bread and bagels.
.
Why is it crucial to maintain a sharp edge for effective slicing?
Maintaining a sharp edge on your kitchen knives, especially on a bread knife, is of paramount importance for several reasons, with effective slicing being the primary objective. Here’s an explanation of the importance of keeping a sharp edge for effective slicing:
Effortless Cutting:
To sharpen the bread knife, effortlessly glide through the bread’s crust and crumb with minimal resistance. This ease of cutting not only saves time and energy but also ensures a smoother, more enjoyable slicing experience in the kitchen.
Clean and precise cuts:
A sharp edge produces clean and precise cuts, preventing the tearing or crushing of the bread. This is particularly crucial when dealing with delicate pastries, soft loaves, or intricate bread artistry, as it preserves the visual and structural integrity of the baked goods.
Maintaining food texture:
A sharp bread knife helps maintain the desired texture of the bread. Dull knives tend to compress the bread, leading to a less appealing texture. On the other hand, a sharp edge slices cleanly through, preserving the light and airy quality of the interior.
Reduced Crumbs and Waste:
Dull knives are more likely to create crumbs and waste as they tear through the bread. A sharp knife, with its precise cutting action, minimizes crumb production, resulting in neater slices and less waste.
Versatility in Slicing
A well-maintained, sharp edge allows for versatile slicing. Whether you’re dealing with crusty artisanal bread or soft, tender loaves, a sharp bread knife ensures that you can adapt to different textures and types of bread with ease.
Extended Knife Lifespan:
Regularly maintaining a sharp edge on your bread knife contributes to the overall longevity of the blade. Dull knives experience more wear and tear, leading to the need for more frequent replacements. Keeping the edge sharp minimizes the strain on the blade, extending its lifespan.
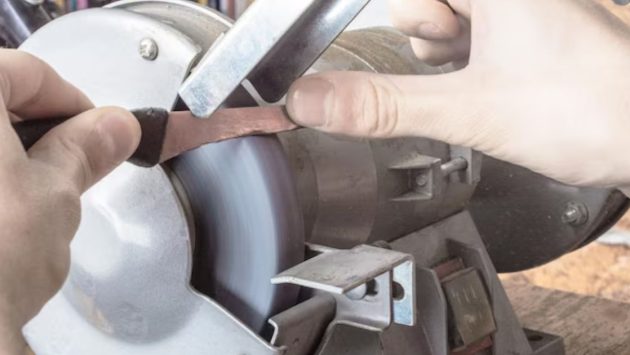
How do you sharpen a bread knife with wetstone?
Step 1: Fold Your Gears
Before starting the sharpening process, ensure you have all the necessary tools and materials, including your bread knife, whetstone, towel or non-slip base, water or honing oil, and a container for soaking if required.
Step 2: Prepare the Whetstone
If your whetstone requires soaking, submerge it in water for the recommended duration. Alternatively, apply honing oil to the surface if it’s an oilstone. Place a damp towel or non-slip base on your work surface to create a stable sharpening platform.
Step 3: Set the Sharpening Angle
Maintain a consistent sharpening angle. For most bread knives, an angle between 15 and 20 degrees works well. If you’re not confident in holding a consistent angle by hand, consider using a knife-hanging guide to help maintain the correct angle.
Step 4: Wet the Bread Knife
Dampen the blade of your bread knife with water. This helps create a slurry on the whetstone, enhancing the sharpening process.
Step 5: Position the Bread Knife on the Whetstone
Place the heel of the bread knife on the whetstone, ensuring the entire edge makes contact. Keep the blade at the chosen angle, and with a firm grip, position your fingers away from the edge for safety.
Step 6: Execute Sharpening Strokes
Using controlled and even pressure, move the blade across the whetstone in a sweeping motion. Use the entire length of the whetstone for even sharpening.
Step 7: Alternate Sides
After a few strokes, flip the bread knife to sharpen the opposite side. Maintain the same number of strokes on each side to ensure an even edge.
Step 8: Check for Burr
A burr, a tiny metal lip formed on the opposite side of the edge being sharpened, indicates progress. Run your fingertip gently along the opposite side of the sharpened edge to feel for the burr. Once you detect it along the entire length, proceed to the next step.
Step 9: Refine with Higher Grit (Optional)
If you have a whetstone with different grits, switch to a higher grit for additional refinement. Follow the same sharpening process to achieve a smoother and keener edge.
Step 10: Test Sharpness
Carefully wipe the blade clean and test the sharpness by making a few gentle slices through a piece of paper or soft material. A sharp knife should cut effortlessly with minimal resistance.
Step 11: Hone and Clean the Knife
If available, use a honing rod to further refine the edge and align the blade. Clean the knife thoroughly to remove any metal particles or residue.
What are common mistakes to Identify during the sharpening process?
Here are some particular shared mistakes to be attentive to throughout the sharpening course and how to correct them:
Inconsistent Sharpening Angle:
Mistake: Failing to maintain a consistent sharpening angle can result in an uneven edge, affecting the knife’s overall performance.
Solution: Use a knife honing guide to help maintain a consistent angle, or practice maintaining the correct angle through muscle memory.
Insufficient Lubrication:
Mistake: Neglecting to keep the whetstone adequately lubricated with water or honing oil can reduce the effectiveness of the sharpening process.
Solution: Regularly check and add water or oil as needed. A dry whetstone can cause excessive friction, heat, and premature wear on the knife’s edge.
Excessive Pressure:
Mistake: Applying too much pressure while sharpening can lead to uneven sharpening, excessive removal of material, and potential damage to the knife.
Solution: Use gentle and controlled pressure. The weight of the knife itself, combined with controlled movements, is often sufficient for effective sharpening.
Uneven Stroke Distribution:
Mistake: Focusing on one section of the blade more than others can result in an unevenly sharpened edge.
Solution: Pay attention to distributing the sharpening strokes evenly across the entire length of the blade. This ensures a uniform edge and avoids creating low or high spots.
Skipping Grit Levels:
Mistake: Skipping the appropriate grit levels on the whetstone can result in an incomplete sharpening process, leaving the edge rough or less refined.
Solution: Follow a progression of grit levels, starting with a coarser grit for initial sharpening and gradually moving to finer grits for a polished edge.
Overlooking the Burr:
Mistake: Failing to detect and address the burr can leave the knife edge less sharp than intended.
Solution: Periodically check for the burr along the opposite side of the edge. Once you feel a consistent burr, proceed to the next step to ensure a complete sharpening.
**Inadequate Testing:
Mistake: Neglecting to test the sharpness of the knife after sharpening may result in overlooking areas that require further attention.
Solution: Test the sharpness by making gentle slices through a piece of paper or a soft material. Adjust as needed for optimal results.
Neglecting Regular Maintenance:
Mistake: Failing to maintain a regular sharpening schedule can lead to prolonged periods of knife dullness.
Solution: Establish a routine for knife maintenance, sharpening when necessary to keep the blade consistently sharp.
What are some maintenance tips for keeping a bread knife sharp?
Maintaining a bread knife is essential for optimal performance in the kitchen. Regular care ensures that your knife remains effective, prolongs its lifespan, and contributes to a safer cutting experience. Here are some maintenance tips to keep your bread knife sharp:
Proper Storage:
Explanation: Store your bread knife in a knife block, magnetic strip, or on a magnetic wall rack. Avoid storing it loosely in a drawer to prevent unnecessary contact with other utensils, which can dull the blade.
Use a cutting Board:
Explanation: Always use a soft cutting board, such as wood or bamboo, to minimize the impact on the knife edge. Avoid hard surfaces like glass or stone, as they can accelerate blade dullness.
Hand Wash Only:
Explanation: Wash your bread knife by hand with mild soap and warm water. Avoid placing it in a dishwasher, as the high-pressure water and harsh detergents can damage the blade and handle.
Immediate Cleaning:
Explanation: Clean the knife immediately after use to prevent food residues from drying and hardening the blade. This makes the cleaning process easier and minimizes the risk of corrosion.
Dry Thoroughly:
Explanation: After washing, dry the knife thoroughly with a towel to prevent any moisture-related issues, such as rust. Pay special attention to drying the area where the handle meets the blade.
Avoid cutting Frozen Foods:
Explanation: Refrain from using your bread knife to cut through frozen foods or hard items like bones. Stick to its intended use on bread and other softer items to avoid chipping or damaging the blade.
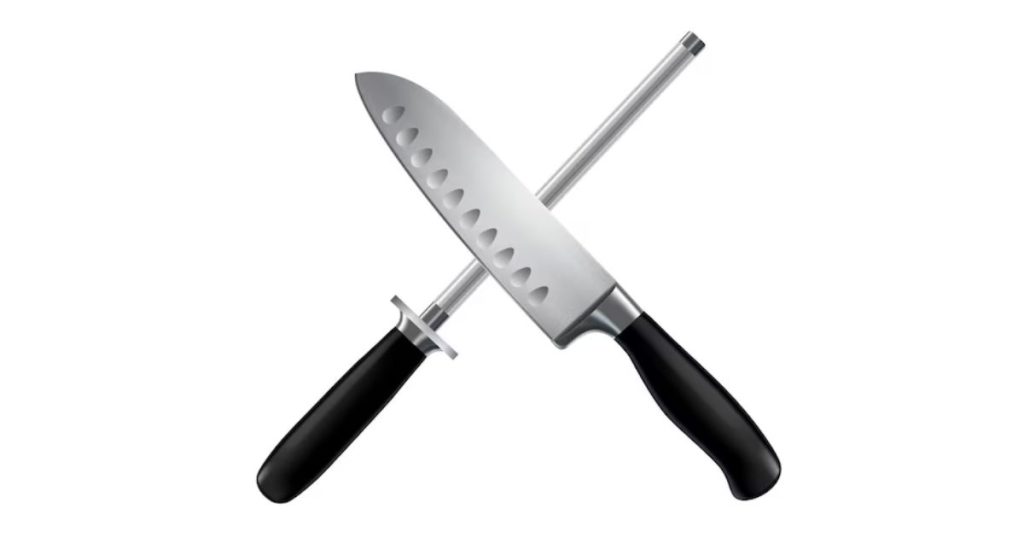
Regular Honing:
Explanation: Use a honing rod regularly to straighten and realign the blade’s edge. Honing doesn’t remove material but helps maintain the knife’s sharpness between sharpening sessions.
Sharpen as needed:
Explanation: Pay attention to the sharpness of your bread knife. If you notice a decrease in performance, use a whetstone or other sharpening tools to restore the edge. Regular sharpening ensures consistent cutting efficiency.
Protect the Edge:
Explanation: Be mindful of the knife’s edge during use. Avoid cutting on hard surfaces or using excessive force, as this can lead to premature dulling and damage.
Conclusion
In conclusion, the art of maintaining a sharp bread knife is not just a culinary chore; it is a commitment to precision, efficiency, and a safer kitchen experience.Regular maintenance, including proper storage, hand washing, and immediate cleaning, is the key to preserving the sharpness of your bread knife.
The benefits of maintaining a sharp bread knife extend beyond mere functionality—they enhance the overall culinary experience, providing satisfaction in every slice.With these practices, your sharp bread knife will continue to be a valuable asset, making every kitchen endeavor a slice above the rest.