
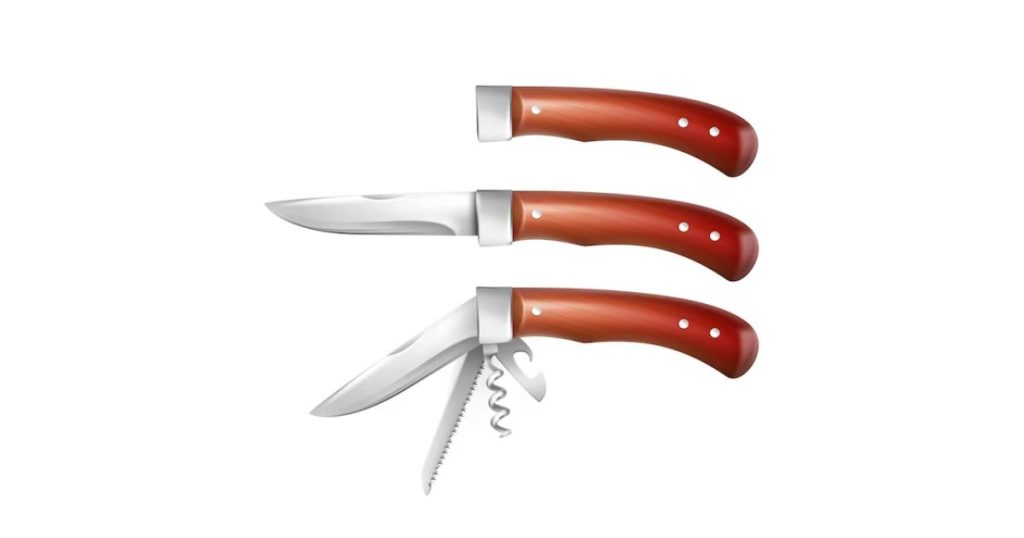
“Fold and Form: Your Ultimate Guide to Handcrafting Knife Scales”
Table of Contents
ToggleIntroduction:
Crafting custom folding knife scales is a rewarding endeavor that allows knife enthusiasts to add a personal touch to their favorite blades. Knife scales, also identified as holders, play a critical role in the functionality and aesthetics of a folding knife.
Whether you’re a skilled craftsman or a learner looking to board a new DIY scheme, this step-by-step leader will walk you over and done making adapted knife scales.
In this leader, we’ll see the wonders of the importance of make-to-order knife scales, the many ingredients offered, and the important apparatuses wanted for the plan.
Why is customizing knife scales important in the realm of knife crafting?
The customization of knife scales is a pivotal aspect of the knife-making process that significantly influences both the form and function of a folding knife. While the blade is undoubtedly the heart of any knife, the scales serve as its soul, providing essential attributes that contribute to a unique and personalized user experience. Here are key reasons highlighting the importance of customizing knife scales:
- Personalization and Identity:
- Customizing knife scales allows individuals to express their unique style and personality. The excellent resources, design, and quality can convert a ready-to-wear knife into a one-of-a-kind tool that reproduces the holder’s sense of taste and favorites.
- Ergonomics and Comfort:
- Everyone’s hands are different, and customizing knife scales provides an opportunity to tailor the handle to fit the user’s grip perfectly. This ergonomic consideration enhances comfort during prolonged use and ensures a secure and confident hold, minimizing the risk of hand fatigue and discomfort.
- Enhanced Aesthetics:
- Knife scales are a highly visible part of a folding knife, and their aesthetics contribute significantly to the overall visual appeal. Crafting custom scales allows for creative freedom in choosing materials, colors, and patterns, resulting in a visually striking and aesthetically pleasing knife.
- Material Selection for Performance:
- Different materials offer varying degrees of durability, weight, and texture. Whether it’s the warm feel of wood, the rugged resilience of G-10, or the modern appeal of carbon fiber, the choice of material can impact the knife’s performance.
- Functional Upgrades:
- Customizing scales provides an opportunity to incorporate functional upgrades to the knife. This could include adding texture for improved grip, contouring the handle for better ergonomics, or adjusting the overall thickness to suit the user’s hand size and grip style.
What are knife scales?
Definition:
Knife scales are the outer coverings or handle components of a knife that are attached on either side of the blade’s tang. They serve to encase and protect the tang while providing a comfortable and secure grip for the user.
Purpose of Knife Scales:
- Knife scales are made with comfort secure grip.and it designed for easy and simple tasks.
- Knife scales can incorporate features that enhance the functionality of the knife. This may include textured surfaces for improved grip, finger grooves for better control, or even integrated mechanisms for specific uses, such as folding knives with locking mechanisms.
Selecting the right size and thickness for the scales
Here’s a guide on how to select the suitable size and width for your knife scales:
- Consider the knife design:
The overall design and intended use of the knife will influence the size and thickness of the scales.
Balance and Weight Distribution:
- The size and thickness of the scales contribute to the balance of the knife. Balancing the knife correctly ensures optimal control and ease of use.
- Functionality and Intended Use:
- The purpose of the knife will impact the size and thickness of the scales. A kitchen knife used for precision cutting may benefit from thicker scales for added control, while a utility or EDC (Everyday Carry) knife might prioritize slim and lightweight scales for easy pocket carry.
- Material Characteristics:
- Different materials have varying densities and weights. Consider the characteristics of the chosen material when determining the appropriate size and thickness. For example, lightweight materials like G-10 or carbon fiber may allow for thinner scales without compromising strength.
- Aesthetic Preferences:
- Aesthetic considerations, such as the desired visual proportions of the knife, can also influence the size and thickness of the scales. Some knife makers prefer a sleek and slim profile, while others may opt for more substantial scales to make a bold visual statement.
- Trial and error:
- If possible, create prototypes or test pieces with different scale sizes and thicknesses to find the most comfortable and functional configuration.
Which are the essential tools for knife scale crafting?
Crafting custom knife scales requires a set of essential tools to shape, refine, and assemble the handle. Here is a list of the key tools you’ll need for knife scale crafting:
- Band saw or jigsaw:
- Purpose: For rough cutting the initial shape of the scales from a larger piece of material.
- Considerations: Ensure the tool is properly set up and the blade is appropriate for cutting the chosen scale material.
- Belt Sander:
- Purpose: To refine and shape the scales more precisely.
- Considerations: Use various grits of sandpaper on the belt sander to achieve a smooth and even finish. Exercise caution to avoid removing too much material too quickly.
- Drill Press:
- Purpose: For drilling precise holes in the scales for pins and the pivot.
- Considerations: Use the appropriate drill bits for the chosen materials. Measure and mark hole locations accurately.
- Clamps:
- Purpose: To secure the scales during cutting, shaping, and gluing.
- Considerations: Use sturdy clamps to ensure a stable workpiece. Consider using protective padding on the clamps to prevent damage to the scales.
- Sandpaper (Various Grits):
- Purpose: To further refine the shape and finish of the scales.
- Considerations: Start with coarser grits for shaping and gradually move to finer grits for a smoother finish. Wet/dry sandpaper can be used for certain materials.
- Epoxy or Adhesive:
- Purpose: To bond the scales to the knife tang securely.
- Considerations: Choose a high-quality epoxy or adhesive suitable for the scale material.
- File Set:
- Purpose: For detailed shaping and smoothing in areas that may be difficult to reach with other tools.
- Considerations: Different file shapes and sizes can be useful for various contours and angles.
- Ruler or Calipers:
- Purpose: For accurate measuring and marking of the scales.
- Considerations: Precision is crucial in knife making, so having accurate measurement tools is essential.
- Workbench or Work Surface:
- Purpose: A stable and dedicated space for crafting the scales.
- Considerations: Ensure the workbench is sturdy and well-lit. Having organized storage for tools is also helpful.
- Vise:
- Purpose: To hold the knife securely while working on the scales.
- Considerations: A vise provides stability and prevents the knife from moving during shaping and assembly.
- Pivot Pin Material:
- Purpose: Material for the pivot pin in folding knives.
- Considerations: Choose a material that complements the scales, such as stainless steel or brass.
How can cutting and shaping the scales be done?
Cutting and shaping the scales is a critical phase in the knife-making process, influencing both the aesthetics and functionality of the final product. This stage involves transforming raw material into the desired handle shape.
Resources and Apparatuses:
- Raw scale material (e.g., wood, Miata, G-10)
- The band saw or Jigsaw
- Belt Sander
- Clamps
- Ruler or Calipers
- Pencil or marker
Steps:
- Design and Layout:
Sketch: Begin by sketching the desired shape of the scales on the raw material. Consider ergonomics, aesthetics, and the intended use of the knife.
Measure: Use a ruler or calipers to measure and mark specific dimensions and hole placements. Accuracy at this stage is crucial for a well-balanced and functional handle.
Cutting the Rough Shape:
Setup: If using a bandsaw, ensure the blade is appropriately tensioned and aligned. Secure the material with clamps.
Cutting: Carefully cut along the marked lines, creating a rough outline of the scales. If using a jigsaw, take your time to follow the lines accurately.
Refining the Shape:
Securing: Use clamps to secure the rough-cut scales to the workbench or another stable surface.
Belt Sander: With the belt sander, refine the shape by gradually removing excess material. Begin with a coarse grit and progress to finer grits for a smoother finish.
Contouring: Pay attention to the contours of the handle. Create comfortable finger grooves or contours that suit the intended grip style.
Hole Drilling:
Marking: Mark the locations for holes to accommodate pins and the pivot. Use the ruler or calipers for precision.
Drilling: Use a drill press to drill holes in the scales. Ensure the holes align accurately for proper assembly. Use the appropriate drill bit for the chosen materials.
Test Fitting:
Check Fit: Test fit the scales onto the knife tang. Ensure that the holes align perfectly and that the scales sit flush against the tang.
Adjustments: If needed, make any necessary adjustments to the shape or hole placements.
Final Shaping:
Fine-tuning: Use files or finer grits of sandpaper to fine-tune the shape of the scales. Pay attention to details, rounding edges for comfort, and ensuring a seamless transition between the scales and the tang.
Staining and polishing wood scales
Here’s a step-by-step guide on staining and polishing wood scales:
Resources and Apparatuses:
- Wooden scales (pre-cut and shaped)
- Wood stain
- Fine-grit sandpaper (e.g., 320, 400, 600)
- Wood sealer or finish (e.g., polyurethane, Danish oil)
- Foam brushes or lint-free cloth for applying stain and finish
- Polishing compounds or wax (optional)
Steps:
Choosing the Stain:
Test the Stain: Before applying the stain to the entire surface, test it on a small, inconspicuous area of the wood to ensure it achieves the desired color. Different wood types may react differently to stains.
Wiping Off Excess Stain:
Wipe-Off Excess: After allowing the stain to penetrate, use a clean cloth to wipe off any excess stain. This step helps achieve an even color and prevents blotching.
Drying:
Allow Drying Time: Let the stained wood scales dry completely according to the instructions on the stain container. This usually takes several hours.
- Fine Sanding:
Fine-Grit Sanding: Once the wood is completely dry, use finer grit sandpaper (e.g., 400 or 600) to lightly sand the surface. This smoothens the wood and prepares it for the finishing coat.
Polishing (Optional):
Polishing: For an added shine, you can use polishing compounds or wax. Apply the polish with a soft cloth and buff the wood scales to achieve a glossy finish.
How can we attach the scales to the knife handle?
Attaching the scales to the knife handle is a critical step in knife-making, ensuring a secure and stable construction. This process involves bonding the scales to the knife tang using adhesive, usually epoxy.
Materials and Tools:
- Knife tang (prepped and cleaned)
- Prepared scales (stained, polished, and drilled)
- Epoxy or adhesive
- Clamps
- Clean cloths or paper towels
- Acetone or rubbing alcohol (for cleaning)
- Mixing cups and stir sticks for epoxy
Steps:
- Prepare the Surfaces:
Clean the Tang: Ensure the knife tang is clean and free from any grease, dirt, or debris. Use acetone or rubbing alcohol and a clean cloth to clean the surface thoroughly.
- Test Fit:
Check Alignment: Before applying adhesive, do a test fit of the scales on the knife tang. Ensure the scales fit snugly and that the holes for pins and pivot align accurately.
- Mix the Epoxy:
Follow Instructions: If using epoxy, mix it according to the manufacturer’s instructions. Typically, this involves combining a resin and hardener in the correct ratio.
- Apply Epoxy:
Even Application: Use a clean brush or applicator to apply the epoxy to both the knife tang and the interior surfaces of the scales. Ensure complete coverage.
- Assemble the Scales:
- Align Holes: Place the scales onto the knife tang, ensuring that the holes for pins and pivot align correctly. Press the scales firmly against the tang.
- Insert Pins and Pivot:
- Insert Pins: If using pins, insert them through the holes in the scales and the tang. This adds structural support and ensures proper alignment.
- Pivot Pin: If your knife design includes a pivot, insert the pivot pin through the aligned holes in the scales and tang.
- Clamp the Assembly:
- Secure with Clamps: Use clamps to secure the scales tightly against the knife tang. Ensure even pressure to promote a strong and uniform bond.
- Wipe Off Excess: Use a clean cloth or paper towel to wipe off any excess epoxy that may have squeezed out. This helps maintain a clean finish.
- Drying Time:
Follow Instructions: Allow the epoxy to cure and dry according to the manufacturer’s recommendations. This typically involves leaving the clamped assembly undisturbed for a specified period.
- Final Inspection:
- Remove Clamps: Once the epoxy has fully cured, carefully remove the clamps.
- Inspect the Bond: Inspect the bond between the scales and the knife tang. Ensure a strong and secure attachment.
- Clean and Finish:
- Clean Residue: Clean any remaining adhesive residue from the knife handle using acetone or an appropriate solvent.
- Final Finish: If needed, apply any final touches to the finish of the scales, ensuring a polished and cohesive appearance.
Conclusion
In conclusion, the process of crafting custom folding knife scales is a fulfilling journey that allows individuals to transform a standard knife into a unique and personalized tool. By selecting the right materials, carefully planning the design, and employing essential tools and techniques, one can create a handle that not only enhances the aesthetics but also improves the functionality and comfort of the knife.
Throughout this guide, we’ve explored the importance of customizing knife scales, delving into the definition and purpose of these crucial components. We’ve discussed various materials suitable for knife scales, ranging from traditional options like wood, bone, and horn to modern choices such as Micarta, G-10, and carbon fiber.
As you embark on your knife-scale crafting journey, remember that experimentation and creativity are key. Don’t be afraid to explore different materials, designs, and finishing techniques to truly make the knife your own. The result will be a functional work of art that not only reflects your skills but also becomes a cherished tool in your collection.
FAQs
What materials are commonly used for making folding knife scales?
Common materials for folding knife scales include wood (such as ebony or walnut), Miata, G-10, carbon fiber, and various types of bone or horn. The choice of material often depends on personal preferences, aesthetics, and the knife’s intended use.
How do I select the correct size and width for my knife scales?
The size and width of knife scales rest on issues like the knife’s design, future use, and the user’s favorites. Consider the ergonomic aspects, balance, and the hand’s natural contours. Creating prototypes or test pieces to find the most comfortable and functional dimensions is advisable.
What tools are essential for crafting folding knife scales?
Essential tools include a bandsaw or jigsaw for initial cutting, a belt sander for shaping, a drill press for creating holes, clamps for securing the scales, sandpaper for refining, and epoxy or adhesive for attachment. Additional tools may include a ruler or calipers for measuring and a vise for stability during work.
Can I stain and polish wooden scales, and what’s the process for doing so?
Yes, staining and polishing wooden scales is a common practice. After shaping the scales, you can apply wood stain for color. After drying, fine-grit sandpaper is used for smoothing. Apply a wood finish like polyurethane or Danish oil for protection and shine. Polishing compounds or wax can be added for an extra glossy finish if desired.
How do I ensure a strong bond when attaching scales to the knife handle?
Achieving a strong bond involves thorough preparation. Clean the knife tang and scales properly, test fit the scales before applying adhesive, and use a high-quality epoxy or adhesive. Apply the adhesive evenly to both surfaces, insert any pins or pivot carefully, and use clamps to secure the scales tightly. Allow sufficient drying time, and inspect the bond for strength and uniformity after the curing process.